 Help Center
Wordpress Lead Form Integration
Setting up a lead form on your website to connect to 4D EMR
4D EMR allows a form embedded in your website to forward new lead information via email and have it appear in the Patient > Nurture > Lead page automatically. This has been tested with Contact Form 7 and Gravity Form plugins in WordPress but should work similarly with other forms plugins as well as other integrators that can send an email with the necessary data.
NOTE: 4D EMR can accept lead information from ANY system that can forward an email formatted as show below to the practice email lead intake address.
To: <practice>@leademail.4d-emr.com
From: Sender
Subject: Lead Form <source>
[Body]
FirstName: Jim
LastName: Jones
DOB: 05/14/2000
Phone: 555-867-5309
Email: jim@jones.com
Interest: Surgery, injections,
Note: I am considering cosmetic surgery
PLEASE NOTE: 4D EMR Support Staff cannot troubleshoot practice websites or Wordpress configurations. If the below instructions do not result in generating an email that is usable by the 4D EMR lead intake system, the practice should contact their web-design provider.
Step 1. Get the WordPress Form email address:
In your 4D EMR go to Practice > Settings > Integrations . The WordPress Contact Form integration is always Enabled by default
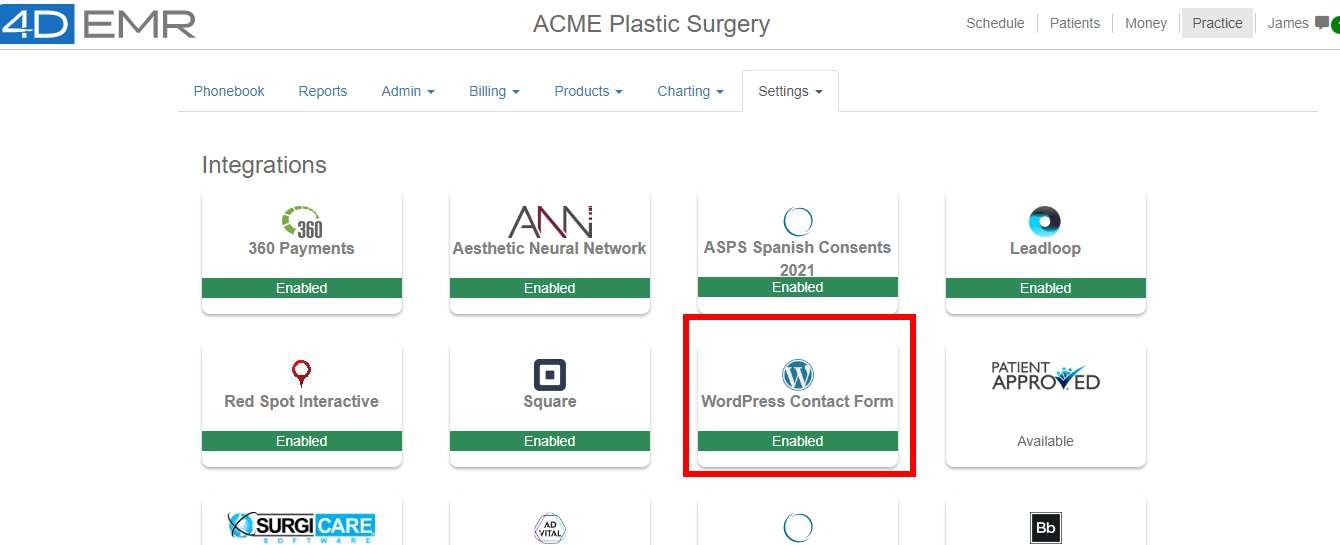
Click on the WordPress Contact Form tile to display the details screen.
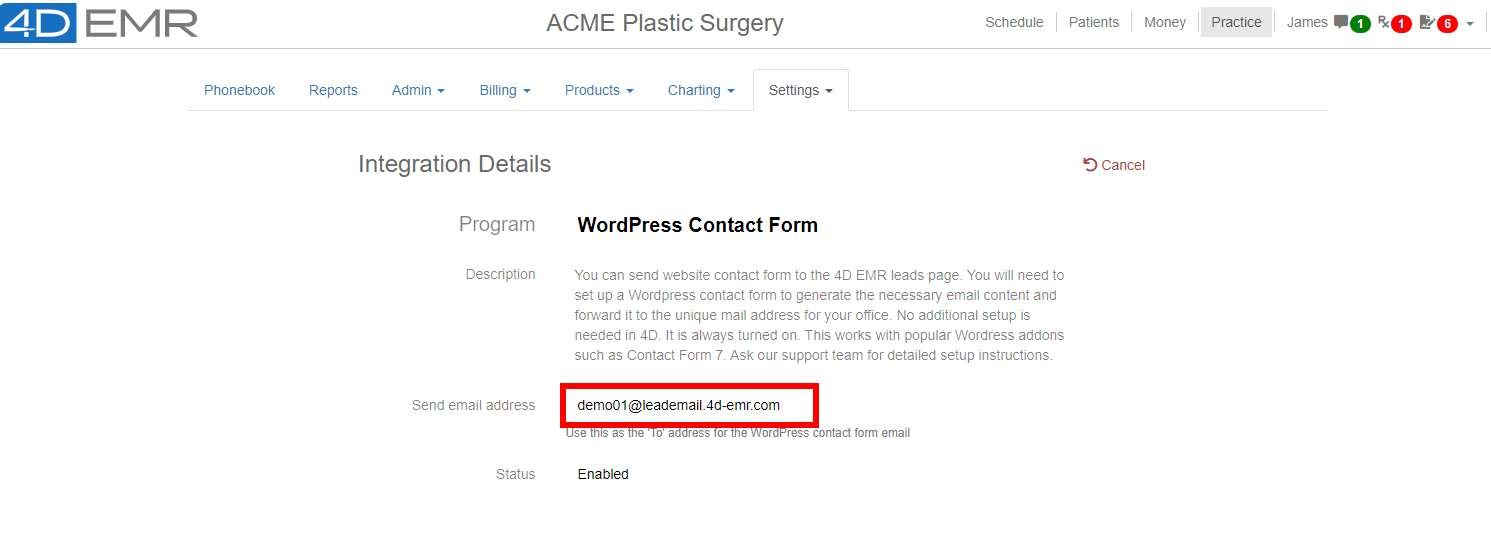
Make note of the “Send email address” which will be unique to your office and will be structured as XXXXXX@leademail.4d-emr.com. This will be the address you will set in the online forms as the “To” address for the email. The unique value at the beginning identifies your office and must be correct for you to receive the data.
Step 2. Add Contact Form 7 or Gravity Form to your WordPress site
The details of this process are familiar to most web designers.
Step 3. Set Up Fields on the Forms
4D EMR can accept the following fields from an intake form
- First Name (required) Last Name (required)
- Phone (either phone or email field should be required so you can contact the lead) Email
- Date of Birth (optional – should be sent as MM/DD/YYYY format)
- Interest (optional)
- Note/Message (optional)
Any other fields will be ignored. You may choose to exclude fields that are not required.
Construction of a Contact Form 7 example:

Example results in the following form displayed on your website:

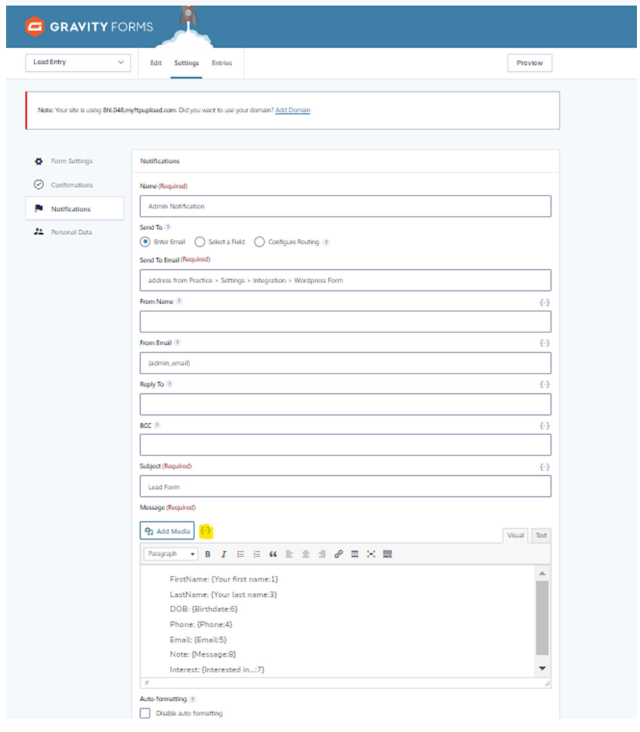
Gravity Form example:

Step 4. Set Up the Outgoing Email
There is a specific format the email message must follow for 4D EMR to read the data.
- Set the “To” field to the email you recorded from Step 1.
- “From” usually needs to include the same domain as your website but you can use anything that the forms allows. It is not used in 4D and it can be as simple as “me@your-website-domain.com”
- Set the “Subject” to “Lead Form”
The ”Message” section needs to list the names of the 4D EMR fields and a pointer or mail tag to the form fields.
The format needs to follow the pattern of label and data.
- FirstName: <pointer to first name field> LastName: <pointer to last name field> DOB: <Birthday field>
- Phone: <phone field> Email: <email field>
- Interest: <pointer to interested in field>
- Note: <pointer to note/message field>
Be aware that the spelling and capitalization of the labels is important and the colon “:” after each of the labels is mandatory.
Contact Form 7 email template example:

Gravity Form notification page example:
You should be able to test the form. There is usually a slight delay of up to 10 minutes before the lead will appear after the form has been submitted.